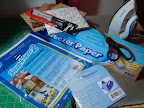
Items you will need:
Fabric for your appliqué
Iron and Ironing Pad
Sharpie Pen (permanent marking pen)
Freezer Paper
Teflon (Appliqué) Pressing sheet
Steam-a-Seam 2 ~ Double stick fusible Web.
A great place to find appliqué is
http://www.fatcatpatterns.com/Patterns that we are using are from this site.
Sindy provides them free and has some wonderful appliqué blocks and ideas.. You will see her patterns off and on in the Block of the Months to come. She also has a PayPal account for donations..:)
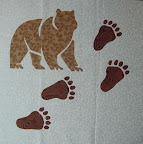
First, have the pattern you want to create (I am attaching four patterns,
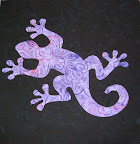
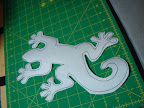
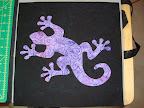
Gecko,
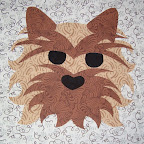
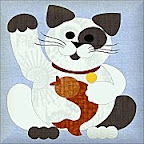
Schnauzer, Cairn/Westi, and
Christmas lights) and fabric in the colors you want them to be created in. We will be doing the Gecko and the Cairn.

First take out the gecko pattern, you will need to put two pages together because the gecko is larger than the page... Cut one side on the line, and then line it up with the other page and tape.

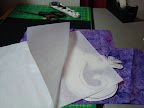
Then take some freezer paper, and lay it over the top of the pattern with the shiny side down.
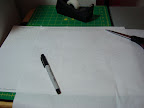
Use a sharpie pen to trace the pattern you want on the paper side of the freezer paper. No need to add a quarter of an inch, as you will not be turning the edge and then stitching it. Using a sharpie pen will not run or bleed on to your fabric or iron. If the pattern expands over two pages, you will need to tape the pattern pages together to trace one whole piece. This is the nice thing about freezer paper, as it comes off a roll and can be as long as you need it to be.
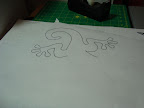
Make sure you label each piece with the letter that corresponds on the pattern as you go along. Cut out your pattern, you can leave extra as you will cut them off in another step.
Look at the pattern, and decide what colors of fabric you want it to be. Make sure the fabric you choose will be large enough for the appliqué piece. Set aside your pattern.
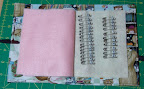
Take your fabric and your steam-a-seam and cut a piece of steam-a-seam slightly smaller than your fabric. You may have more than one piece that will be of the same color/fabric so you will want to decide how much you will need. The reason the steam-a-seam needs to be slightly smaller is when you iron the fabric to the steam-a-seam, you do not want to get the glue on the iron.
Put the steam-a-seam on the ironing table, with the shiny side up, and the paper side down, then lay the fabric on top with the right side up and the wrong side next to the steam-a-seam. Iron over the fabric to adhere the two pieces together.
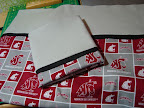
Note: Read the package to guide you as to how long it should be pressed and what setting your iron needs to be on. Different manufacturers have slightly different settings. Place the cut out patterns you have traced and place them on the fabric, shiny side down on top of the fabric that is right side up. Place other patterns that need the same fabric also at this time. Iron this (these) into place.
Now you should have you should have Freezer paper on top, Fabric next, then the steam-a-seam.

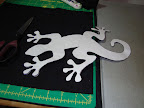
Cut the pattern out.
Continue the rest of the pieces in the pattern.
On to the next steps...
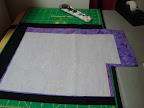
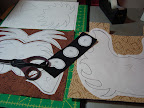
Lay out the instructions/pattern layout, and arrange the pieces so you will know what is what.
Depending on the pattern you are creating it will depend on what you will do next.
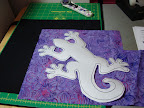
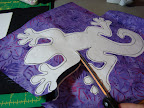
If your pattern is one piece as in the “gecko” pattern, you can peel the freezer paper from the front, then remove the paper from the back, place it where you want it and iron it directly on the fabric you are using.
Peel the freezer paper away from the front. Save this as it can be used again.
Remove the backing by scratching it with a straight pin.
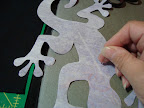
Grab where the scratch is and peel it off. Do not try to peel it from the edge, as you may separate the interfacing from the fabric and fray the fabric, instead of the paper backing.
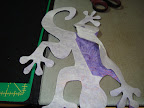
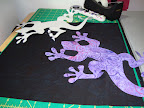
Place the appliqué piece where you want it and iron it directly on the fabric you are using.

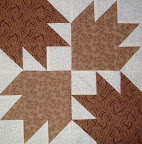
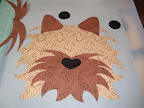
 If you are having to build the pattern from many pieces
 as in the Cairn & Westi you will need to use the Teflon/Appliqué pressing sheet..
Lay down the Teflon preshksing sheet on the ironing area.
When looking at the pattern you will find you will start with the A piece, and build on the other pieces from there. You will need to peel the freezer paper off of the front , remove the paper from the back and lay it on the Teflon pressing sheet and use the iron on it to hold it into place. Continue on with B, C, etc..
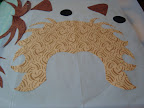
Once all the pieces are where you want them and are ironed on to the Teflon pressing sheet, peel the whole pattern off of the Teflon sheet, and lay it where you want to press it down on the fabric.
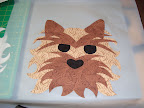
Now you have the choice of sewing, by hand or by machine. Enjoy!!